Car scratches are the automotive equivalent of a paper cut—annoying, unsightly, and always showing up at the worst possible moment. With the 2026 lineup of scratch removers promising miracle fixes, it’s time to go deeper than the marketing and see what really works, why it matters, and what most people miss when reaching for that magical bottle.
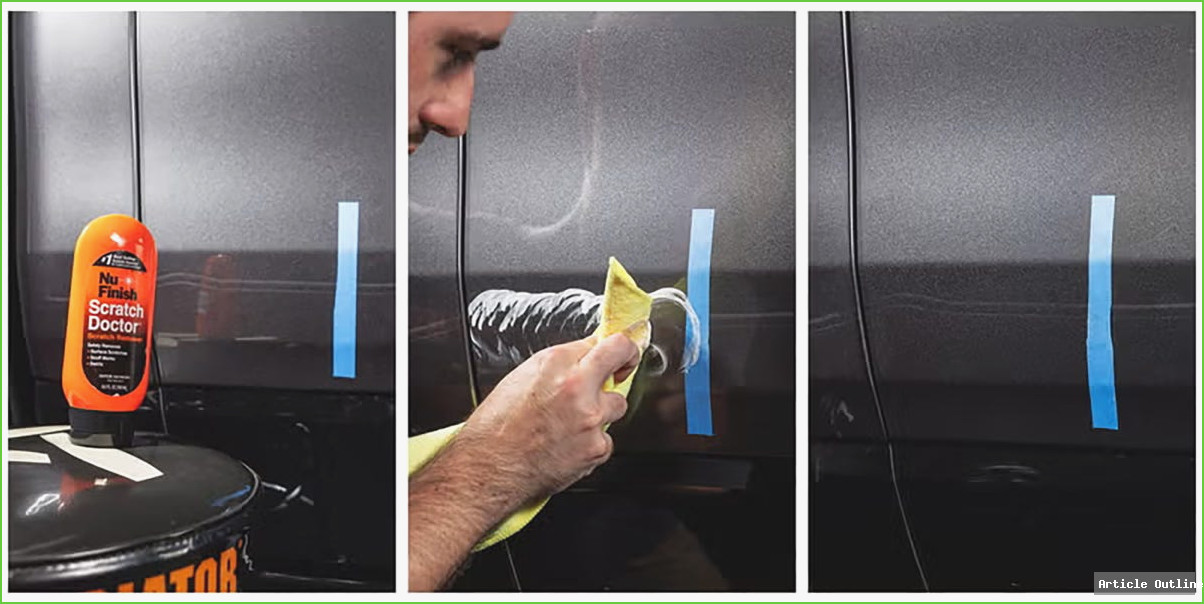
Why This Matters
- Paint correction is more than cosmetic—it affects resale value, rust prevention, and your car’s curb appeal.
- DIY scratch removers bridge the gap between costly professional repairs and ignoring the problem, saving time and money for everyday drivers.
- With car ownership costs climbing (the average annual maintenance is up to $1,200 according to AAA), affordable, effective solutions matter now more than ever.
What Most People Miss
- Not all scratches are created equal. If your fingernail catches in the scratch, it’s likely too deep for a DIY fix—don’t waste your money or risk making it worse.
- Many consumers believe all-in-one products are magic, but results depend heavily on proper prep, technique, and scratch severity.
- Household remedies like toothpaste can actually damage your paint further—leave them in the bathroom where they belong.
- Most kits target clear coat scratches only. If you see primer or bare metal, it’s time to call in a pro.
Key Takeaways
- DIY scratch removers work best for minor clear coat damage. Use the “fingernail test”—if you can’t feel the scratch, you can likely fix it.
- Always follow up with a protective wax or sealant to prevent future damage.
- Invest in a quality kit (usually around $20) rather than improvising—it’s cheaper than a respray and safer for your paint.
- Permanent results are possible if the scratch is shallow and you use the right technique.
Comparisons & Industry Context
- Professional resprays can cost upwards of $500 per panel, while DIY kits offer a quick fix for a fraction of the cost.
- Recent advances include hybrid compounds and nano-tech solutions, but the basics remain unchanged: Surface prep and patience win the day.
- 2026’s top kits are more user-friendly than ever, with integrated applicators and detailed instructions, but results still depend on user diligence.
Timeline: The Typical DIY Scratch Removal Process
- Assess: Run the fingernail test to check depth.
- Clean: Thoroughly wash the area to avoid rubbing in dirt.
- Apply: Use the compound as directed, with the correct pad.
- Buff: Polish to blend the repair.
- Protect: Seal with wax or clear coat touch-up.
Pros & Cons
- Pros: Cheap, fast, effective for light scratches, easy to use.
- Cons: Useless for deep scratches, can worsen damage if misused, not all products are equal.
The Bottom Line
If you’re staring down a spiderweb of light scratches after a rogue shopping cart attack, don’t panic. Modern scratch removers can be surprisingly effective—if you know what you’re doing and don’t expect miracles on deep damage. When in doubt, invest a little in a reputable kit rather than improvising, and save the pros for the big jobs. Your car—and your wallet—will thank you.